Oculus Quest 2 First Build (Controllers in 3D Space)
Import Oculus Integration Package
- Go to the Unity Asset Store, sign in using your Unity credentials, and then click Open in Unity. Unity opens the Package Manager window in the Unity editor.
- Enter Unity credentials, if prompted.
- In the Package Manager window, expand Oculus Integration, select the latest version, and then on the bottom-right side of the window, click Upgrade.
- After the upgrade is complete, click Import to import the latest SDK into your project.
- In the Import Unity Package window, leave all the files and folders selected, and click Import.
- When prompted to update the Oculus Utilities plugin, click Yes, and then click Restart.
- When prompted to update Spatializer plugins, click Upgrade, and then click Restart.
- If you’ve clicked Yes and restarted Unity, you’re all set and you don’t need to take any action. In case, you clicked No at that point, you can update it manually
- In Unity, go to Oculus > Tools > Update OVR Utilities Plugin.
Adding Controllers to Unity Scene
- After Importing Oculus Integration Package Search for OVRCameraRig Prefab.
- Add OVRCameraRig to Scene.
- Under OVR Manager (Script) Change Tracking Orgin Type to Floor Level.
- Add OVRControllerPrefab to Child of Left and Right ControllerAnchor.
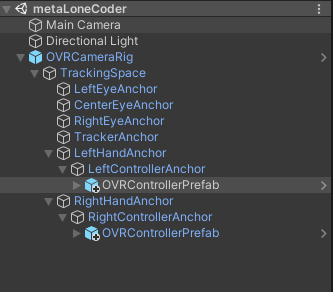
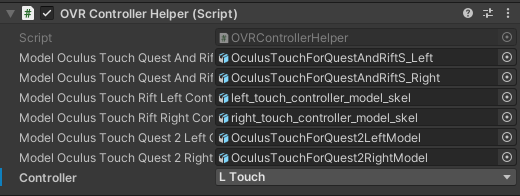
- Change Controller to L Touch and R Touch Respective of Hand.
- Select Oculus Quest 2 from Run Device
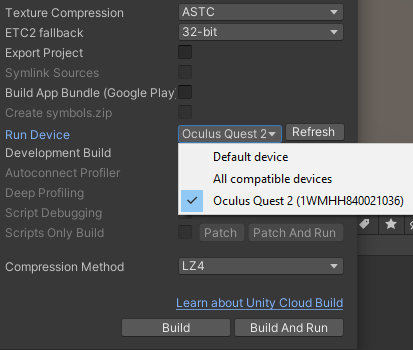
- Build and Run